I know you can buy those vinyl folder things to protect e-readers, but really, how boring. I decided to make my own cover from two bits of felt I bought yesterday at Calico and Ivy in Balmain. If you want to make one too, here's how.
You could adapt these instructions for other gadgets, of course – just leave about 1 cm (1/2 inch) all round, for the seam and so you can get your gadget in and out of the cosy without shoving.
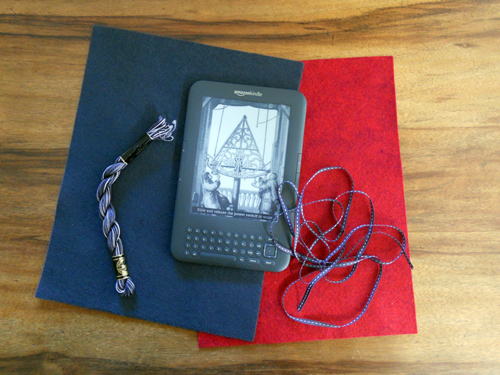
1. You will need two pieces of felt, some embroidery thread and a piece of ribbon, as well as general sewing supplies.
2. Cut a piece of felt 15 x 19 cm (6 x 7 1/2 inches) for the front of the cover.
3. Cut a piece of felt 15 x 27 cm (6 x 10 1//2 inches) for the back and flap of the cover.
4. Using your Kindle as a template, trace around its curves at all four corners of the back and flap piece, and around the bottom corners only of the front piece. Cut away the corners.

5. Matching the raw edges, pin the two pieces together.

6. Tack the two pieces together. Remove the pins.

7. If you have a straight eye, or don't mind wonky lines, you can sew without ruling a line first. Otherwise, rule a line using tailor's chalk, as I did, about 5 mm (1/4 inch) in from the edges.
8. Thread a needle with embroidery thread (I used variegated pearl cotton) and knot the end. Start sewing near where the two pieces join. Bring the needle up from the inside of the pouch to conceal the knot. Make a couple of backstitches across the join of the two pieces to reinforce.

9. Work a line of running stitch around the edge of the flap. When you get to the join on the other side, make another couple of backstitches to reinforce, then keep going with the running stitch all the way around the pouch.
10. Once you return to your starting point, make a couple of small backstitches on the back of the work, fasten the thread, pass the needle inside the pouch to conceal the end of the thread, and cut the thread off.

11. Sew a length of ribbon to the middle of the flap, insert your Kindle, tie the ribbon around it and you're ready to go. Happy e-reading!

That looks great - I love the ribbon tie. I just can't decide whether or not to buy a kindle, it is very tempting, considering the piles of books I have everywhere!
ReplyDelete